Piano Lacquer Finish: How a Mirror Surface Is Built Layer by Layer
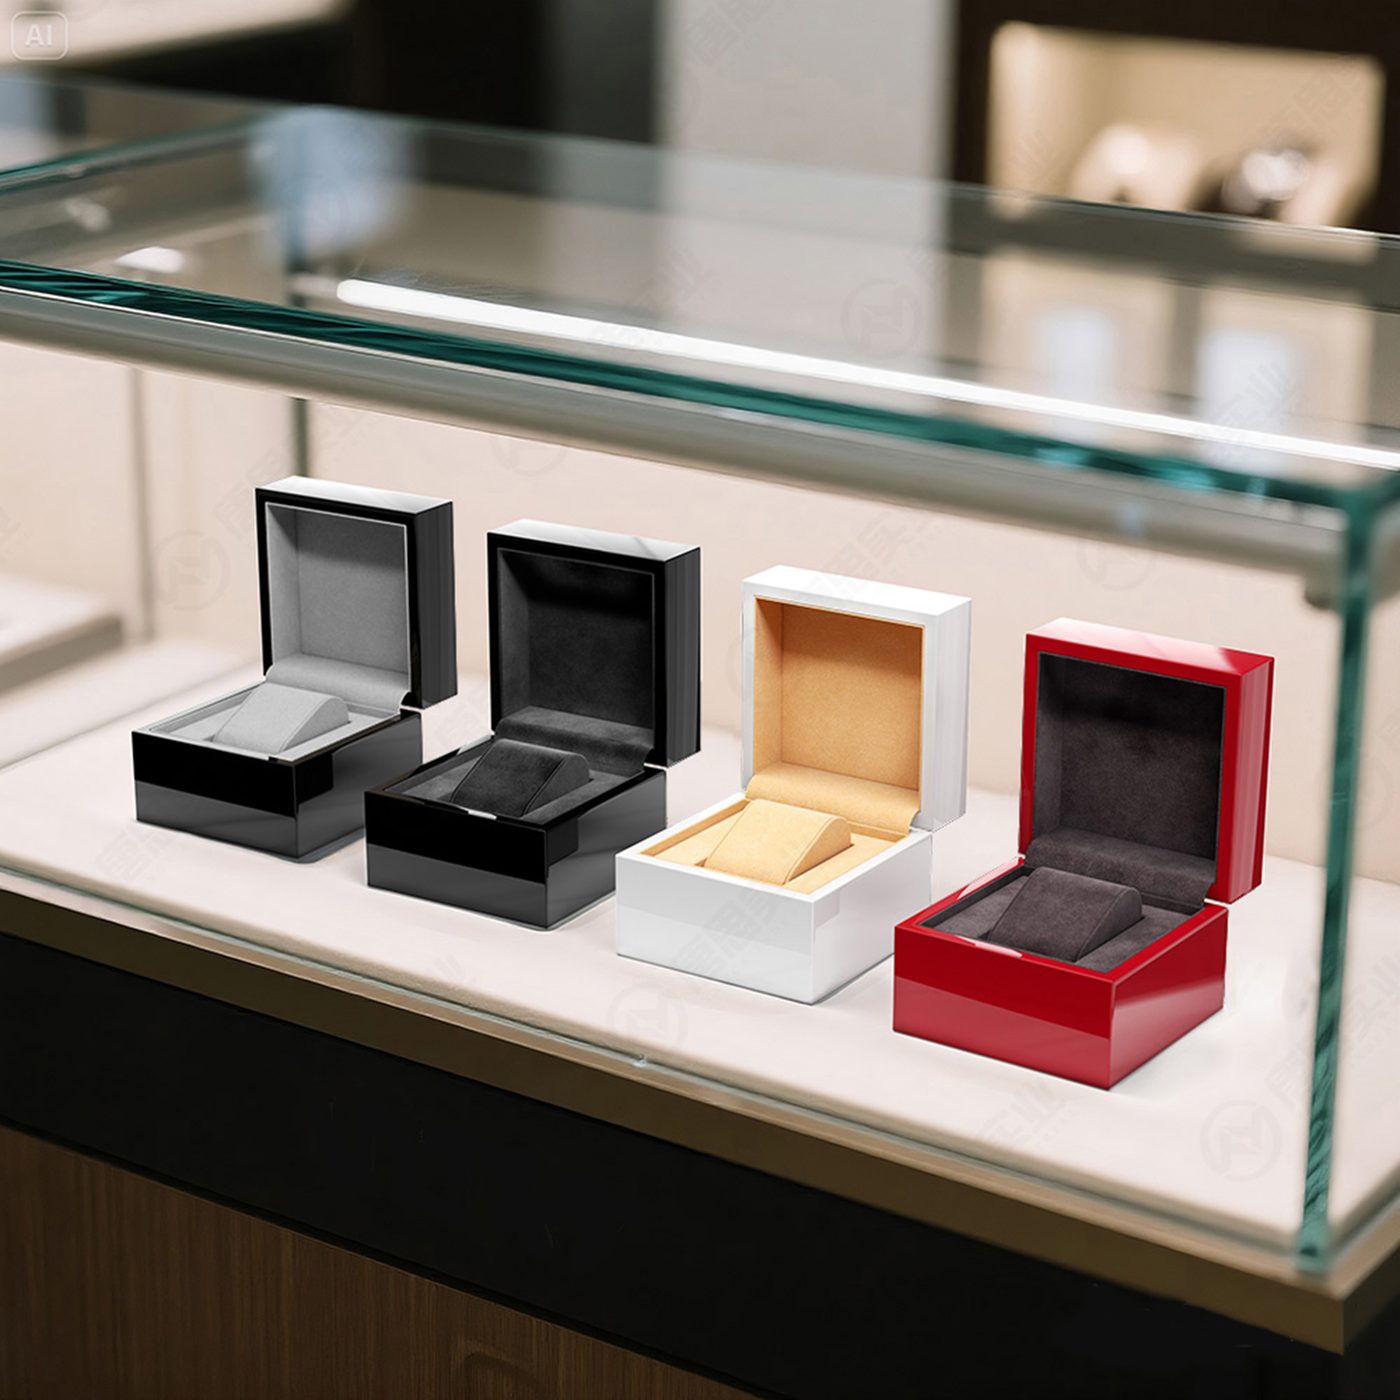
"Piano lacquer" is one of the most requested — and most misunderstood — finishes in luxury packaging. Buyers often treat it as a colour choice. It is not: it is a multi-day process, and the difference between a good and a bad one only shows up under light. Here is what actually happens between a raw board and a mirror surface.
What "piano lacquer" really means
The name comes from the hand-rubbed finishes once used on grand pianos: a deep, glass-like surface where the reflection is sharp rather than hazy. The result depends on three things — a perfectly flat substrate, a coating built up in layers, and enough curing and polishing time. Skip any of the three and you get an almost-mirror, which is worse than an honest matte finish.
Step 1 — The substrate has to be flat before it is beautiful
Gloss magnifies every defect. Panels are precision-cut and CNC-shaped, then finely sanded so coatings bond properly. High-gloss boards also need a stable core and a controlled workshop environment: a panel that absorbs moisture unevenly will telegraph the movement through the top coat weeks later.
Step 2 — Primer: the layer nobody sees, that decides everything
Primer spraying builds the base that the colour sits on and determines adhesion. On a piano-lacquer box the primer stage is also where small surface imperfections are filled and levelled — this is why a properly built gloss finish feels thick and even rather than thin and "painted".
Step 3 — Colour matched to your reference
Top coat colour matching follows your Pantone reference. Deep black and dark navy remain the classic gloss colours because they read as luxury on a shelf; soft-ivory and coloured gloss are achievable but far less forgiving, since any unevenness in the layers becomes visible. If your brand colour is light, expect a stricter specification and more sample rounds.
Step 4 — Drying and curing under controlled temperature
Curing is where gloss finishes are won or lost. Constant-temperature curing lets the coating harden evenly; rushing it — or letting humidity swing across the day — traps solvent and produces the dull patches and "orange peel" texture that customers notice immediately. This stage is time, not labour, and it cannot be compressed without changing the result.
Step 5 — Polishing, in stages
The mirror is cut and refined through multi-stage polishing rather than sprayed on. Each stage removes the marks left by the previous one until the surface reflects cleanly. This is also the last chance for QC: any dust trapped under the surface is found here, not after packing.
Gloss vs matte: a specification decision, not a taste decision
| High-gloss piano lacquer | Maximum perceived value and shelf presence · unforgiving of defects · best on simple flat panels and dark colours |
|---|---|
| Matte / soft-touch lacquer | Hides small imperfections · fingerprints do not show · a contemporary, quiet-luxury feel |
| Wood veneer | Real grain and warmth · grain direction becomes part of the design |
| Leather wrap | Tactile, premium · works with embossing and foil |
Many programmes use both: a gloss exterior for impact, a matte or suede interior for contrast. The interior is the surface your customer touches most, so treat it as a design decision rather than a default.
Where piano lacquer makes sense
Watch boxes, jewelry cases, perfume presentation boxes and rigid gift boxes carry gloss finishes best — flat, simple forms where the surface is the statement. On complex structures with many moving parts, every additional joint is another place the finish can fail; sometimes a cleaner structure with a perfect gloss beats an elaborate one with an average finish.
How to specify it on a purchase order
- Name the finish and the target appearance: "high-gloss piano lacquer, deep black, mirror reflection" — not just "glossy".
- Send a physical colour reference: a Pantone chip, or a sample you already own.
- Approve a physical sample: 3D digital proofing locks the structure before any board is cut, then sampling takes about 15 days with 2 rounds of revisions included.
- Plan for the time: curing and polishing cannot be shortened; production lead time is about 30 days after order confirmation.
- Check the certification chain: ISO 9001 for the quality system, FSC for wood and paper sourcing, and CE / RoHS / REACH for Europe and the USA — all of which we hold.
The short version
A piano lacquer surface is the visible result of a flat substrate, a levelled primer, Pantone-matched colour, unhurried curing and staged polishing. Specify it by appearance and reference, not by adjective — and give the process the days it needs. See finished examples on our custom wooden boxes and custom watch boxes pages, compare what each finish does to budget in the cost guide, or send your reference for a quotation within 24 hours.
The finish itself is built over several days of spraying, controlled-temperature curing and staged polishing. In project terms, sampling takes about 15 days including 3D digital proofing and 2 rounds of revisions, and production lead time is about 30 days after order confirmation.
Yes, colours are matched to your Pantone reference. Dark colours are the most forgiving; light and pastel gloss finishes require stricter control of the substrate and layers, so expect more sample rounds and tighter handling.
It depends on the product and the shelf. Gloss maximises presence and perceived value but shows every defect, so it suits flat, simple structures. Matte hides minor surface variation and resists fingerprints, which is why many programmes pair a gloss exterior with a matte or suede interior.
Yes — foil stamping, screen printing and debossing are all possible. On dark gloss, metallic foils give the cleanest contrast; tell us your logo file in AI, C4D or PDF and we will confirm the options for the finish you choose.